Get the preset pack here
As a tutorial, a short description of the choices behind every preset.
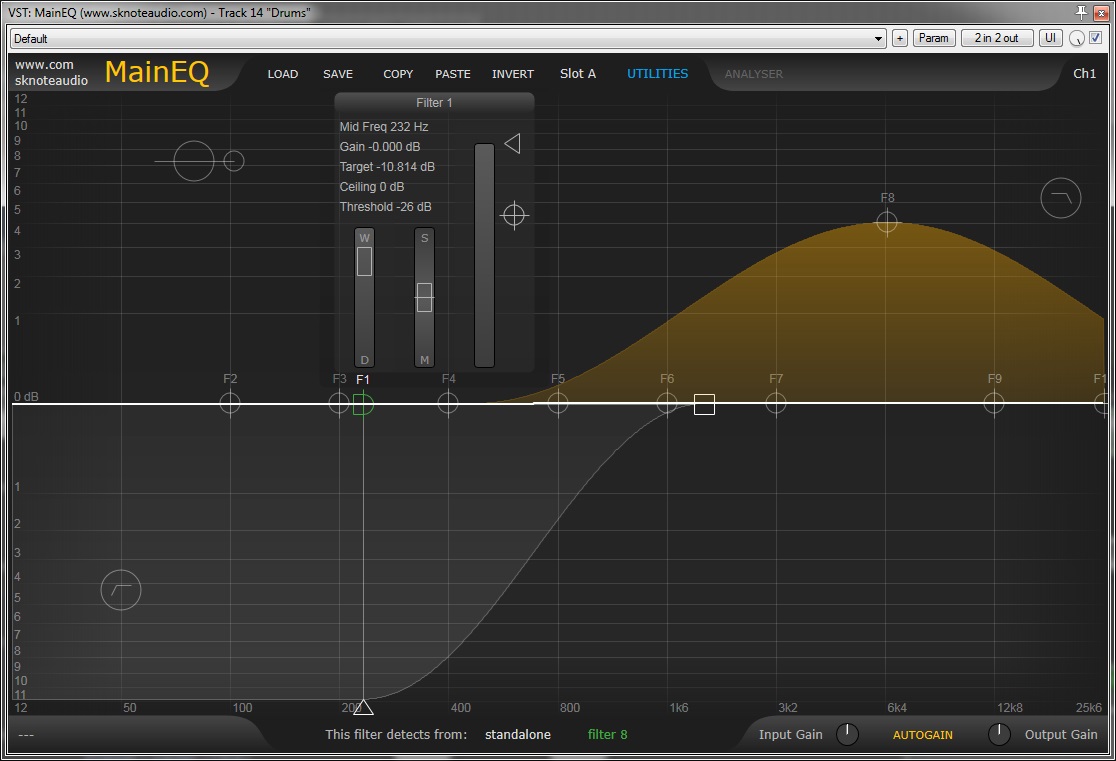
De_Muddify
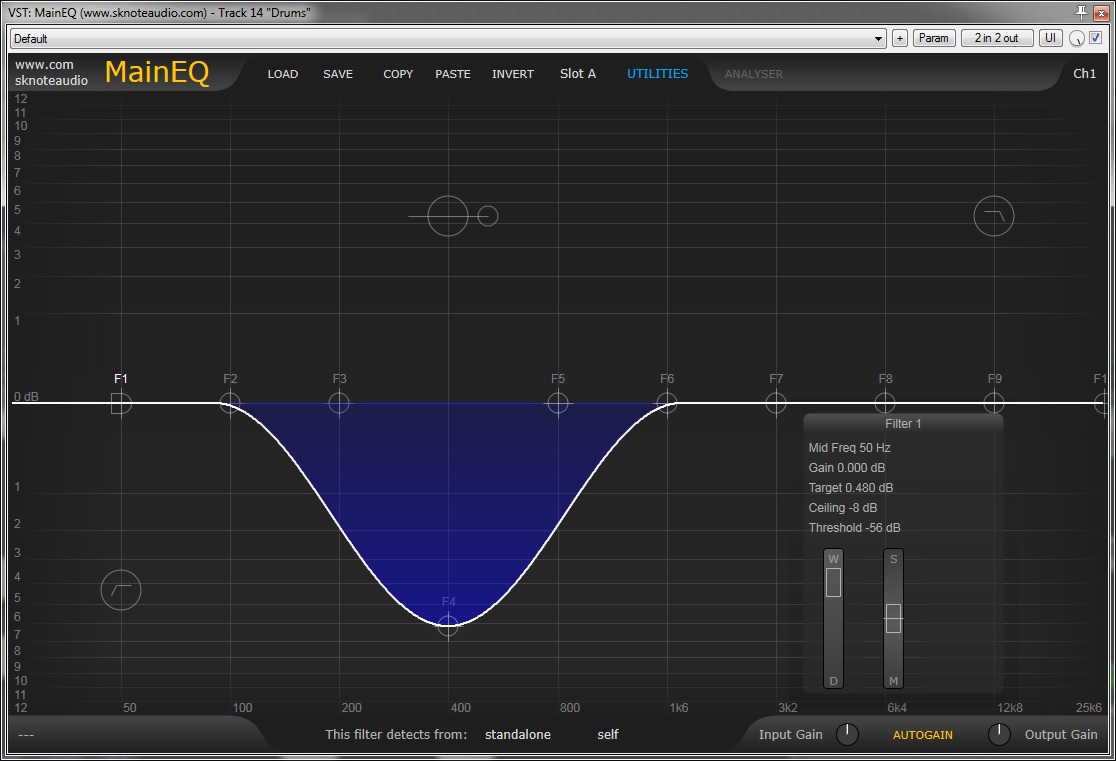
400Hz region often means “Mud”. Cutting that band usually removes too much weight from the track.
In this preset the band is set to be cut on low levels and normal on higher levels. Low levels get mud removed while transients keep their body.
Filter 4 has a negative base gain and a neutral target gain. It is driven by its own band’s level. When it detects a transient, goes to neutral. When the level through it goes down, it cuts out the mud.
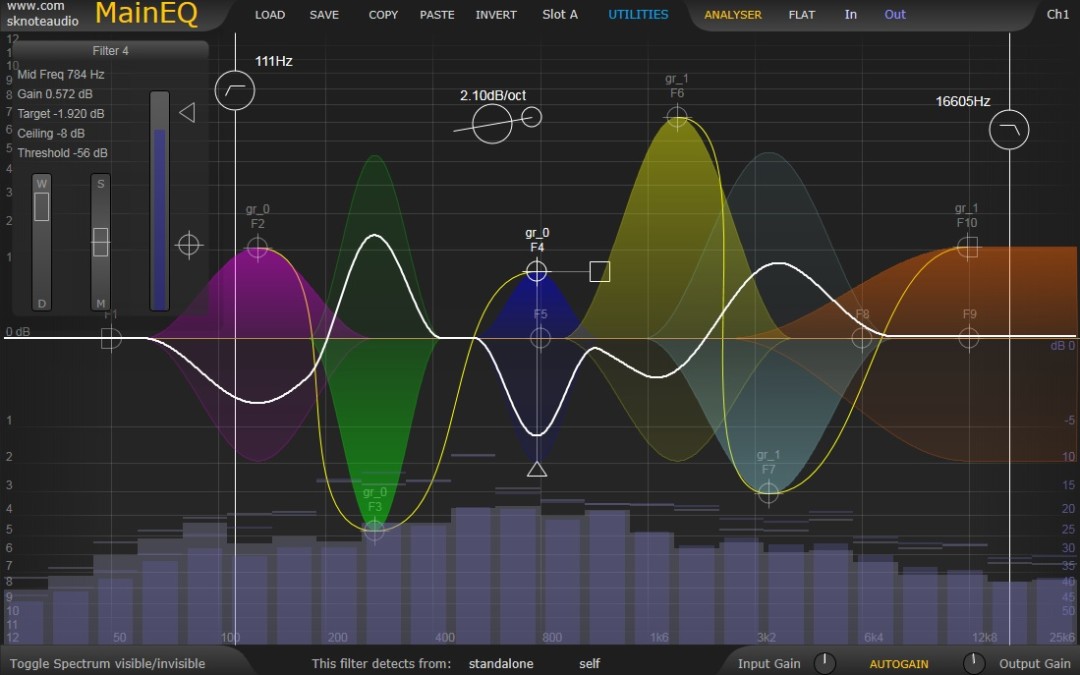
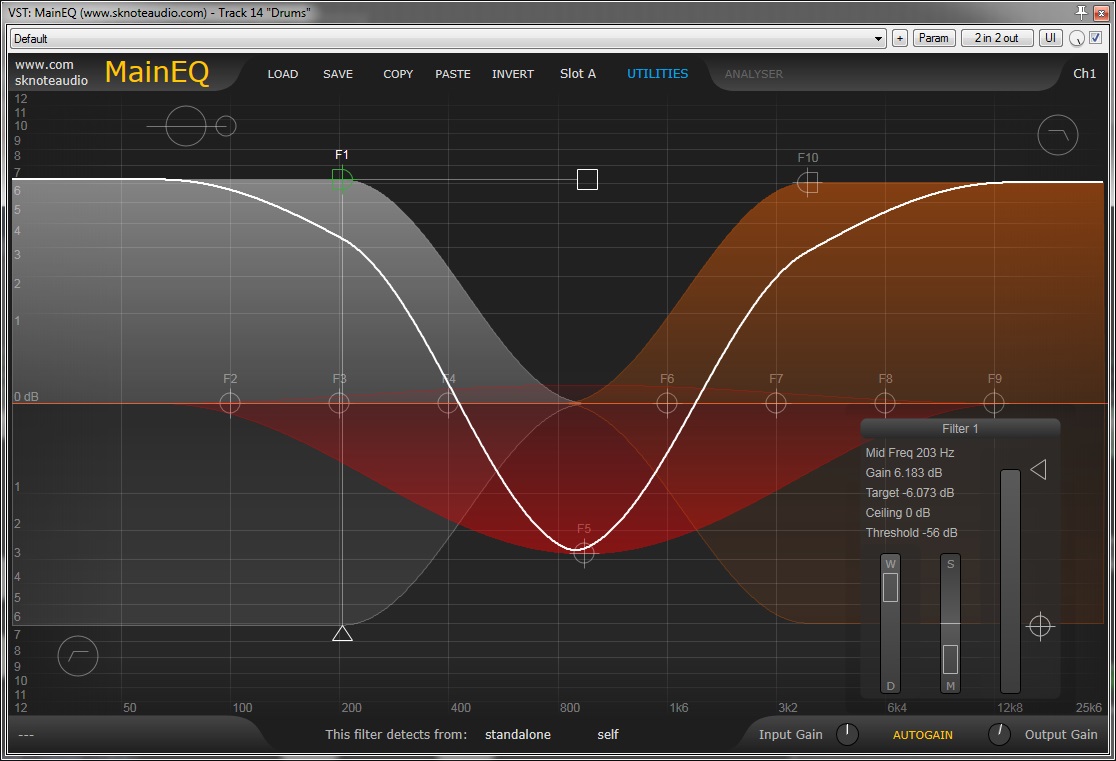
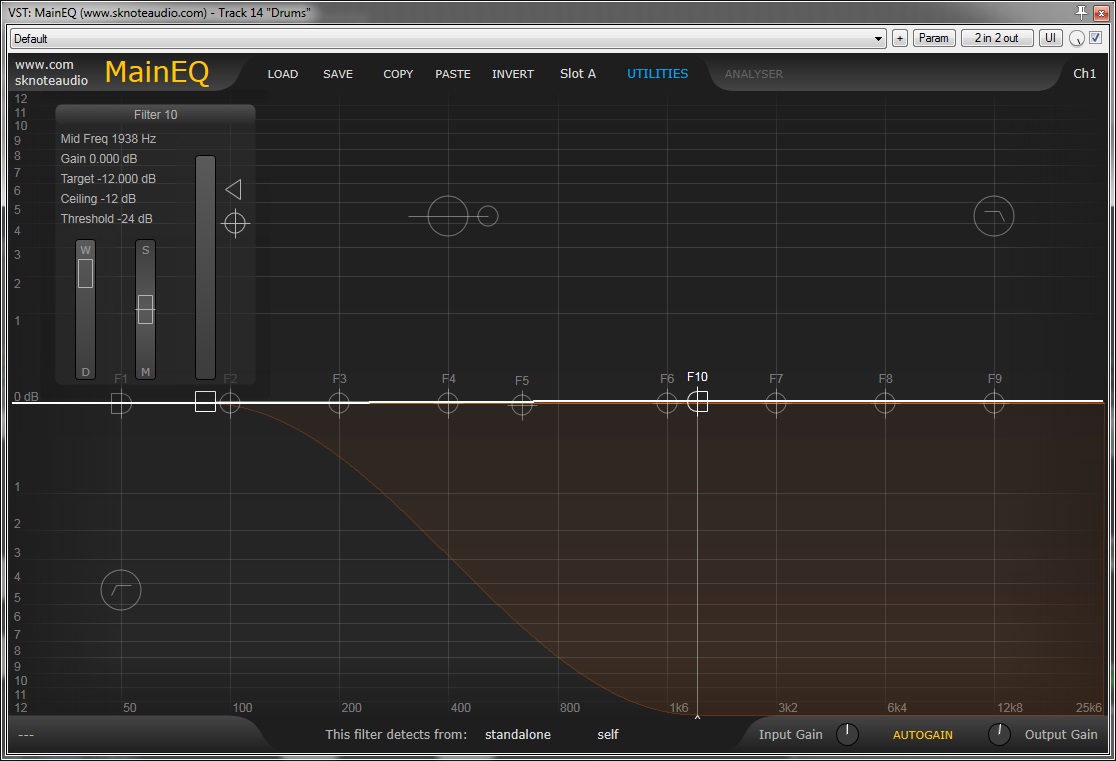
Drums_Big_Side
Highest frequency region is usually associated to “air”, “width”, “space”, “size”.
A static boost on the stereo signal uis usually too blatant and can introduce harshness.
In this preset we used the Mid/Side feature to add a big boost to the highest frequency range but only on the Side component of the stereo signal. We also made it dynamic, with a huge boost as a starting point, going down to a target cut when levels go higher. Levels are set to have the overall curve always moving, more in the boost range.
Use the Input Gain knob to set this, it is compensated and its net effect is just to set internal working levels (could be called “sensitivity”).
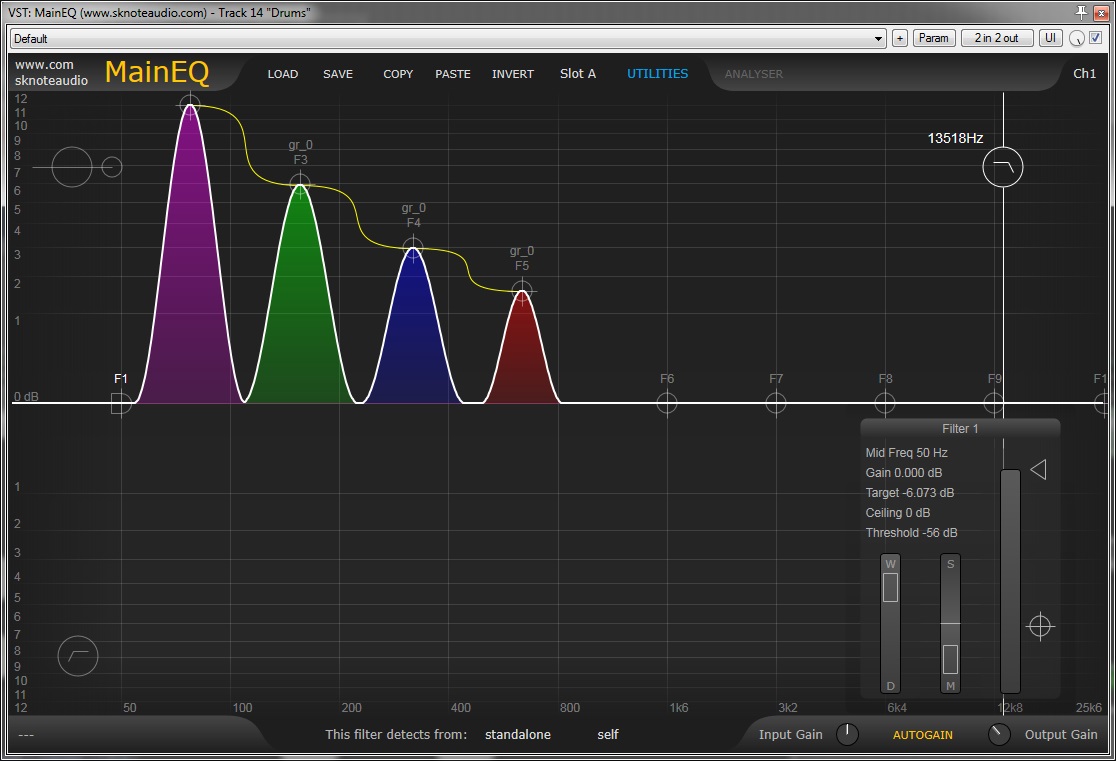
Drums_Retuner
There is a psycho-acoustic effect coming from shifting the “formants” of an audio signal. Make simple, flattening the spectrum and moving the original shape elsewheregives a strong effect of pitch-shifting, which on drums is more like re-tuning the drums.
Here we used three filters to cut the original shape out (they are cutting, in the image). To set them:
- Set a filter to boost. Change its frequency spanning the spectrum until it gets the main component of the sound.
- Add another one and look for an higher frequency component.
- Repeat with a third filter, higher frequency component.
- Adjust by ear to include the main “character” of the target drum in the track.
- Link these filters ina single Poly (use Ctrl-click) and set them to cut, e.g. -6dB.
- Engage three more filters, set them to exactly compensate for the effect of the first Poly (same frequencies, opposite boosts). Check bypass, the EQ should be neutral. Link these new filters in a second Poly.
- THe first Poly sets the target range, the second poly sets the new tuning. Move the second Poly around (keeping the same gain, move it horizontally) to hear new tunings.
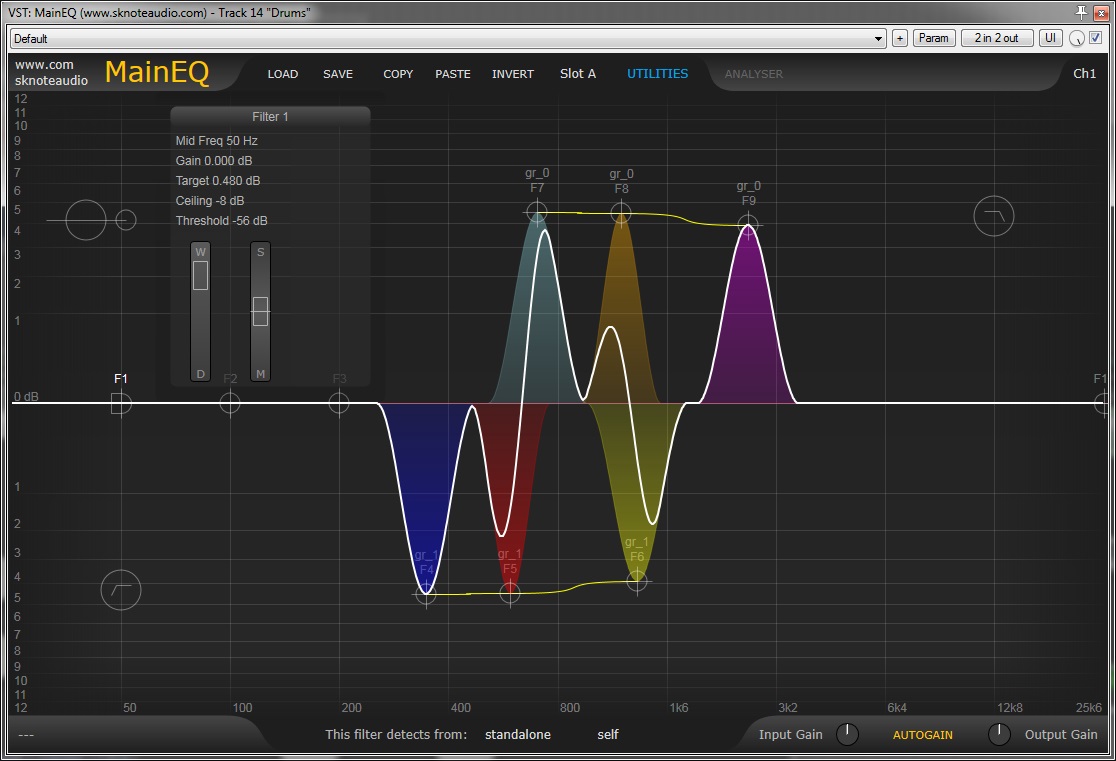
Highs_Rule_Lows
High frequency transients may need space. Low frequency region usually containg a big part of the overall energy.
In this preset we set a filter as a pure detector (on the right, note how it is not affecting the overall curve because its filtering action is switched off by its square handle).
Another filter, on the left, uses the inter-band control of MainEQ, being set to receive the control level from the first filter (Filter 8, which is set to detect through its own band).
The higher the control from Filter 8, the lower the low content. Low range leaves space to hghj frequency transients, then go back on sustain and tails.
Master_3Bands
This is a three-bands mastering preset. Low and high frequency ranges are set to be stronger on transients and neutral on sutain and tails.
Midrange is set to be neutral on higher levels, down on lower levels, to keep presence but leave a “Loudness” smile otherwise.
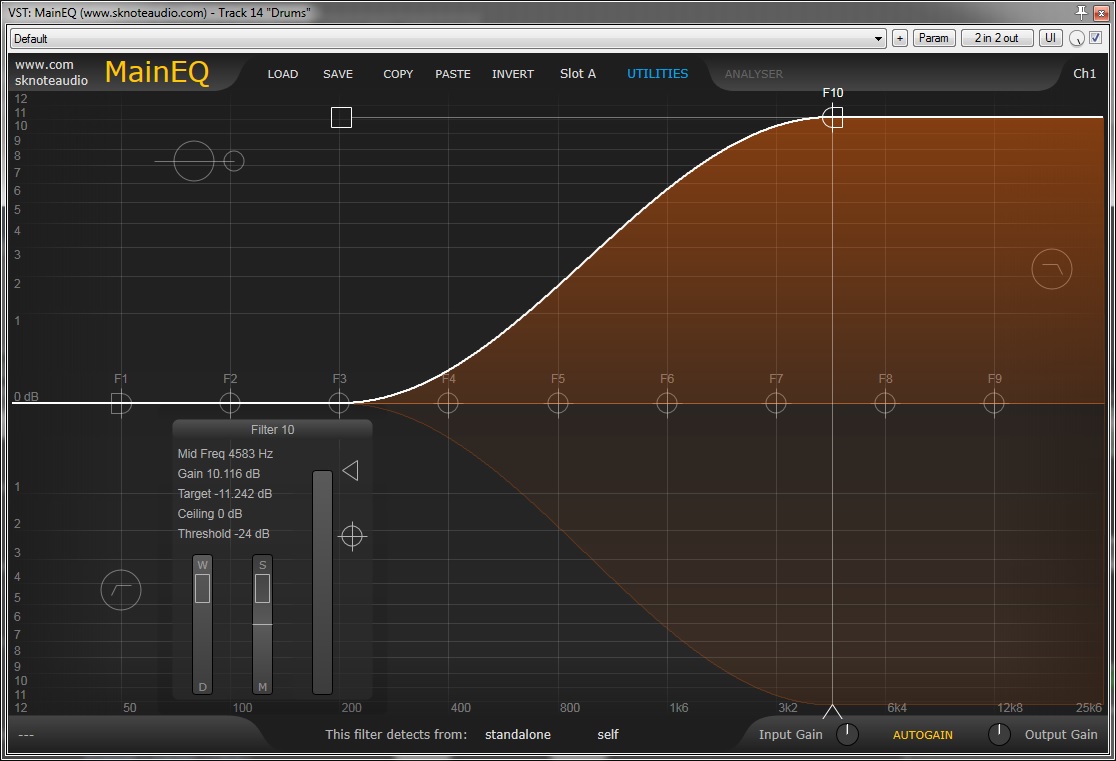
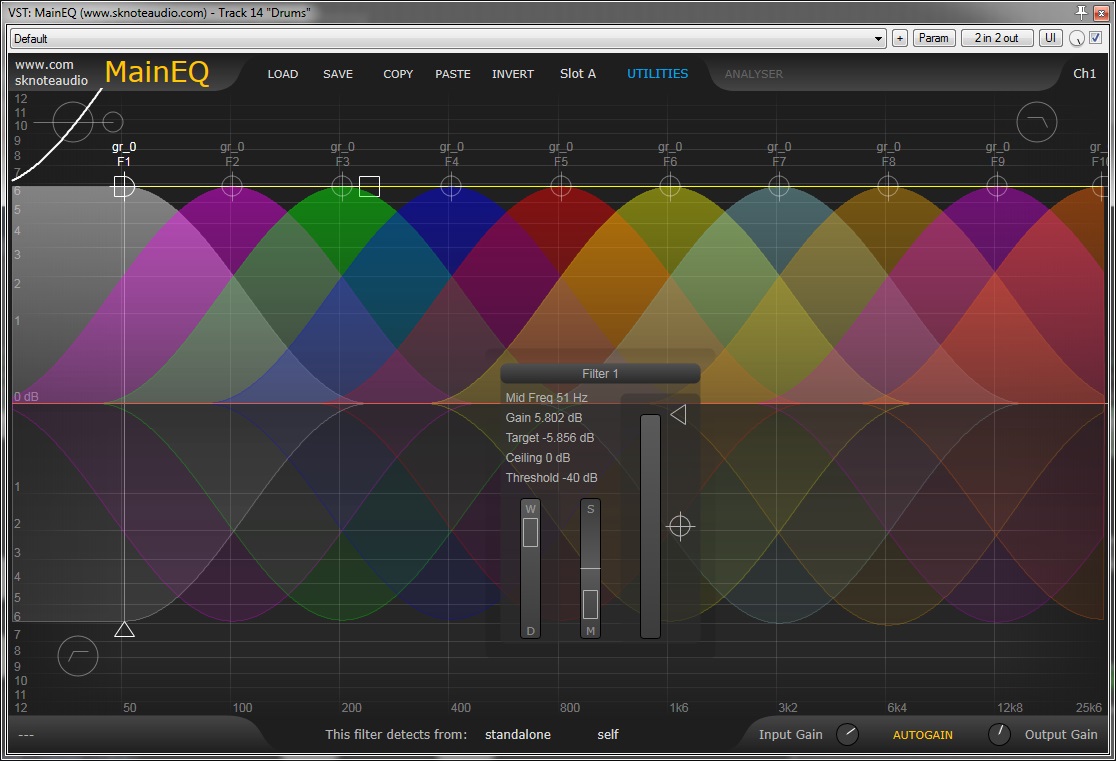
Octave_Filter
This is a special filter which takes advantage from Polys. Four filters are set to decreasing gains and 1 octave frequency steps. Boosts and cuts happen on the fundamental and on relevant harmonics. Try it on bassdrum, setting the main filter on the lowest main component of the drum.
Super_MultiBand
This preset sets a very special multiband compressor. All the bands are engaged, constant spacing, same settings, each one reacting to its own frequency band.
Use the Input Gain control to set it so that the overall curve keeps moving around the center (neutral). YOu can get beautiful multi-compression with this magic preset.
Hear it in action here:
Warmify_Transients
We always have that “Tape” sound in mind. This preset uses a particular setting to get that warmifying effect. A filter is set to a broad cut on high frequencies, reacting to its own incoming level. Threshold and Ceiling settings are key to this effect: they are set to a level range exactly the same as the programmed filter cut. When the level reaches a threshold, it cannot go beyond that. Warmifying effect, a ceiling to the content of high frequencies. Change filter’s frequency to choose how strong the effect is.
Use Input Gain instead of changing threshold and ceiling, to set the overall sensitivity of the effect.