PSLTubeComp is a product in a series developed with www.prostudiolive.com.
We followed a complicated procedure to make this one: design an original tube device, build it as a prototype, calibrate and analyse it, model it as a software product. This way we were able to design something interesting without any cost constraint (the hardware unit won’t be sold) and with hands free from any design limit. Also, starting from hardware helps with getting inspiration and ideas.
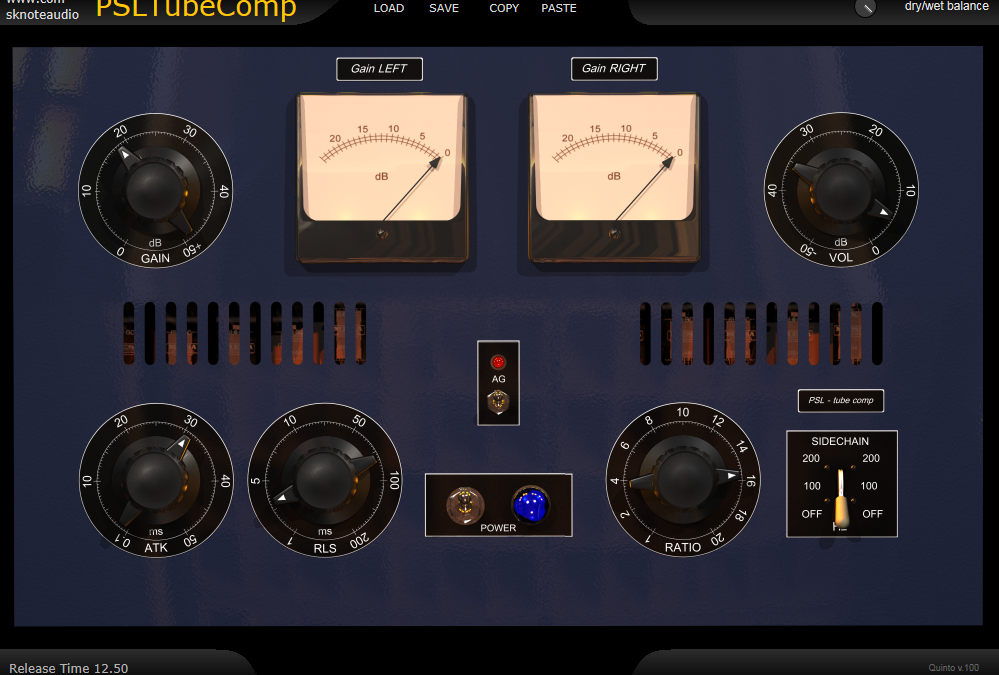
PSLTubeComp is a stereo Tube Compressor, with full control on dynamics.
Its controls are:
- Input Gain knob: from 0 to +50 dB. Use it to push the signal against a fixed internal compression threshold.
- Output Volume knob: from -50 to 0 dB. Use it to compensate for internal gain and to match the original final level of the audio signal (also see AutoGain option below).
- Attack time knob. Sets the time constant for the sidechain, the time the circuit need to act on the audio signal. The slower, the biggest part of a transient will pass through. Aim to the right intermediate value for “snap”.
- Release time knob. Sets the other controllable time constant for the sidechain. The time the circuit needs to recover from compression once the signal level goes below the fixed internal threshold. The slower, the drier the sound. The faster, the more tail you’ll get. Aim to the right intermediate level to add sustain to a source.
- Ratio knob. Sets the compression ratio (something like the “sensitivity” of the compression). Note that this circuit has been designed “the old way”, with an action that actually involves several changes for different values on Ratio, e.g. knee, multiple time constants, threshold, shape of the compression curve and so on. On some sources different values of Ratio can affect different frequency regios of the audio signal.
- Sidechain filter selector. This control sets an highpass filter in the sidechain. The frequencies below the setting are less affected by compression. Three options are available: experiment for the best low-range sound when conpressing hard the audio.
- AutoGain switch. This feature makes setting the compressor a breeze. It is a true AutoGain, it constantly monitors input and output to keep their levels matched. It stops forever once satisfied (it is _not_ a continuous compression). While the control is engaged, autogain is triggered again from a movement of any other control.
- Polarisation of the tubes. The two grids on the sides are actually two controls. You can drag each one vertically to set internal parameters of the tube circuits. Left Grid is a control on input stage polarisation: increase it for a lot of warmth (too much could make the wrong signal dull). Right Grid controls intermediate stage polarisation. Increase its value for more distortion. Tip: the right settings for attack time, left and right grids affect signal’s peaks in a lot of different ways.
- Power switch. When switched off, completely disables the effect and just sends the input signal to the output.
- Load button: gives access to the filesystem to load a preset from disk.
- Save button: to save a preset to disk.
- Copy button: this is a nice preset management copy-through-clipboard feature. Copies the whole current preset. Going through clipboard lets us copy from an instance to another one.
- Paste button. Copies the whole preset from the clipboard to the current instance. Great for starting from the same template on several instances and making small adjustments from there.
The right settings give an action useful for a lot of sources, from clean to extremely distorted.
The circuits are modelled at a component-level for detailed behaviour.