
Being a multiband envelope shaper, Mattertone is ideal for treating drums, be it independently or in a complete loop. The latter is precisely what we will do in this tutorial, so let’s get going!
Here’s our example track:
We will now use the plugin to emphasize both the kick and the snare while simultaneously tidying up the hats and percussions.
Enveloping the Hits
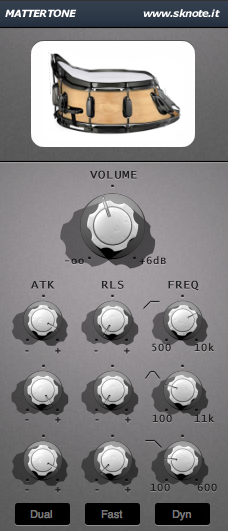
First we insert an instance of Mattertone on the drum bus. There are three sets of controls available, each of which covers a different frequency range: The upper set affects the higher frequencies, i. e. hats, cymbals, etc., the one in the middle works best on snares or claps, and the lower set takes care of the kicks. However, there’s nothing wrong with experimenting. Since the frequency-knobs (FREQ) in the middle and above cover almost the same range (100Hz – 11kHz, 500Hz – 10kHz), but use different filter types (band pass or high pass, as indicated by the little icon on the left), it can be a great idea to process the high frequencies with the controls in the middle for instance!
The principle behind the controls is pretty straightforward: Increasing the attack (ATK) will give us a punchier, snappier impact; turning the release knob (RLS) will either shorten or lengthen the sustain of the sound. For our desired effect we turn the attack almost all the way up and the release down. The trickiest part might be to determine the correct frequency settings: We use our ears until we can clearly hear the kick, snare, and hats respectively.
The interface should now look something like this:
The Result
Now let’s listen back to the track with Mattertone engaged:
As you can hear the loop gained some more definition. The hats in particular sound a lot tighter in comparison.
You can download the preset for Mattertone here: Mattertone_Electro_Drums_Preset.FXP.