MixingRoom is a mixing-thorugh-headphones tool, based on six modules:
- Headphones calibration.
- True ear sensitivity models (360 x 360°)
- Ideal immersive mixing environments.
- Target Monitor/Headphones modelling.
- Real (sampled) immersive environments.
- Loudness-contour modelling (how our hearing sensitivity is affected by absolute listening levels).
Getting started.
- Select the model of Headphones you are wearing (big menu, top-center) (repeatedly press the key with the initial of your model to easily scroll!).
- Activate the “Studio” tab (top).
- Set a song you know playing in loop, pick a “Person” model that gives you the best feeling (top-right, small menu).
- Click on the studio image (center), drag (vertically and horizontally) to virtually rotate your head in the environment (Ctrl-click to set it to default). Use this to decide which “Person” is the closest to your real hearing in real places. Stick to that Person.
- The listening matrix (top, full-width) lets you move from one listening “environment” to another one.
- Click on menus to set the matrix, click on A, B, C selectors to activate one “environment”, click on the top tab (Studio, Headphones, Places) to quickly switch from a class to another one.
IMPORTANT: Input gain knob (bottom-left) doesn’t affect the true input level. It affects the models. Its main use is to align the sound to ear’s response to absolute listening levels (Loudness contours). Keep it in its mid position for neutral listening, increase the value to emulate higher volumes, reduce its value for lower absolute levels.
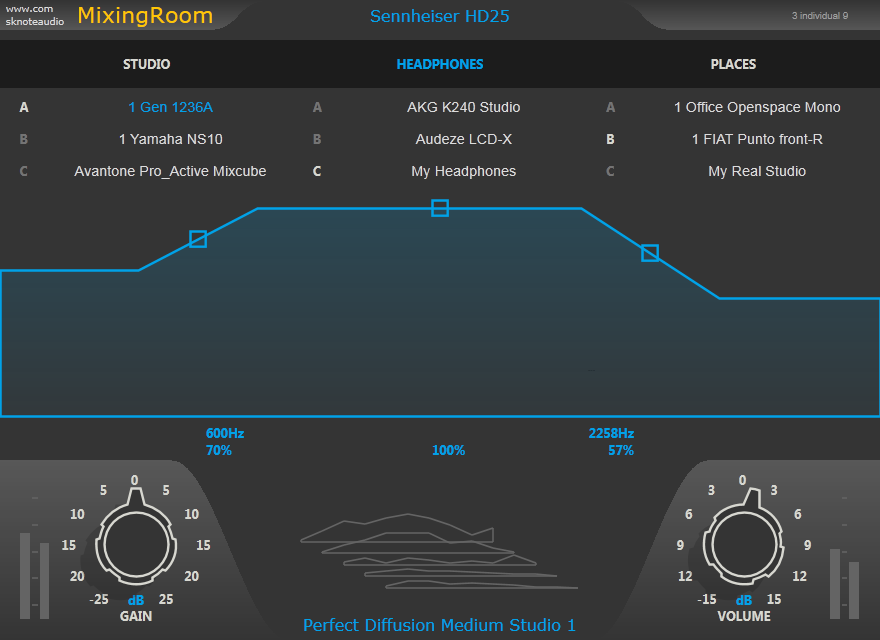
To fine-tune the calibration of your Headphones, select C for “My Headphones” at the center on the matrix. The studio 3d view is replaced by a graphical mask. The curve defines the level of detail applied to the calibration. Higher values mean more detail. There are three frequency ranges available. Set the level and cross-oves frequencies for the ranges. Low and Mid can usually be kept between 75 and 100%. High is where the this control is usually useful.
Remember that calibration is performed on a defined set of units for each model but not on your unit (until you send it here for calibration), so even small differences could need some taming on the highly sensitive high range. Reduce the level in the high range for smoother sound.
While in Studio tab, you have an additional menu (center-bottom) that defines the studio. There are ambiences and anechoic option. Set the menu to anechoic to get a dry version of the sound of selected monitors.
While in Places tab, you can still virtually “rotate your head” by dragging the studio image.
This immersive modelling is not aimed to gimmicks or virtual reality. Our ear’s response varies greatly with directions so “moving” gives lots of additional clues to reveal details in the mix we are refining, more than using a fixed, averaged curve.
These instructions use “Headphones” but everything is applicable to hundreds of included In-Ear-Monitors and Earphones, too.