
MotorTown is far more than a virtual drum plugin. It’s also a song building tool, and it even gives you all sorts of tools to shape the sound of the drums thanks to its suite of built in effects – compression, equalization, and more. In this tutorial, we will use these tools to give the original drum set a whole new character.
For demonstration purposes, we’ve set up a basic groove featuring kick and snare as well as some tambourines. Here’s what it sounds like with no further processing:
And this is how the same drum loop sounds after some effect treatment:
Let’s see what we did here!
Global Controls
We start with the global controls next to the MASTER-fader. These controls affect each part of the drum kit and can have a pretty drastic impact on the overall sound. By turning the DECAY-knob all the way up we add a lot of, well, ‘decay’ to the individual hits. This immediately gives the kit a bigger character. We do the same with the TUBE-control, which adds some serious weight due to some lovely tube saturation. But we don’t stop there: By increasing the values of DRIVE and TAPE we introduce even more saturation. However, we make sure not to create actual (audible) distortion. The A-ENH-knob is also set to maximum. The highs will now be enhanced which results in a brighter sound. Finally, we increase the WIDTH a bit. In conjunction with the high DECAY value the drums will sound even bigger.
Bass Drum
Let’s work on the individual drum hits. To modify the sound of the bass drum we change the microphone and tuning in the upper right corner of the interface. The ‘Condenser 1’ microphone has a brighter sound than the original one (‘Crystal Clear’). We can enhance this ‘brightness’ by changing the TUNING to ‘Mid2.’ Now the kick is more prominent, cutting through the mix. To take this even further we turn to the EQ and compressor section in the lower left corner of the GUI. Both LOW and HIGH gain knobs are set to maximum. As for the compressor, we choose the VMU1-model, switch it on, and dial in about 25% of compression.
Snare Drum
Next up is the snare drum. Like with the kick we choose the ‘Condenser 1’ microphone. But unlike last time we go for a ‘Low’ tuning. In terms of EQ, we take off some lows while boosting the highs considerably. The snare now imparts a bright sound. We can make it more ‘snappy’ by applying some FET-compression (compressor model ‘FET1’).
Tambourine
Finally, let’s work on the tambourine. This is supposed to be the least prominent part of our drum kit, so we don’t want to exaggerate it as much as the kick and snare. Thus, we only use the PAN-channel to shape the sound of the tambourine. The ‘Dynamic 3’ microphone seems to attenuate the initial bright tone of the instrument, so we stick with that. In the EQ section, we turn down the highs to minimum as well as setting the frequency crossover as low as possible. The tambourine is now very unobtrusive. However, by dialing in some FET-compression we can pronounce the rhythmic aspect a bit. Finally, we make some general volume adjustments in the mixer section (kick the loudest, snare louder, tambourine lower). Done!
The interface of the plugin should now look something like this: 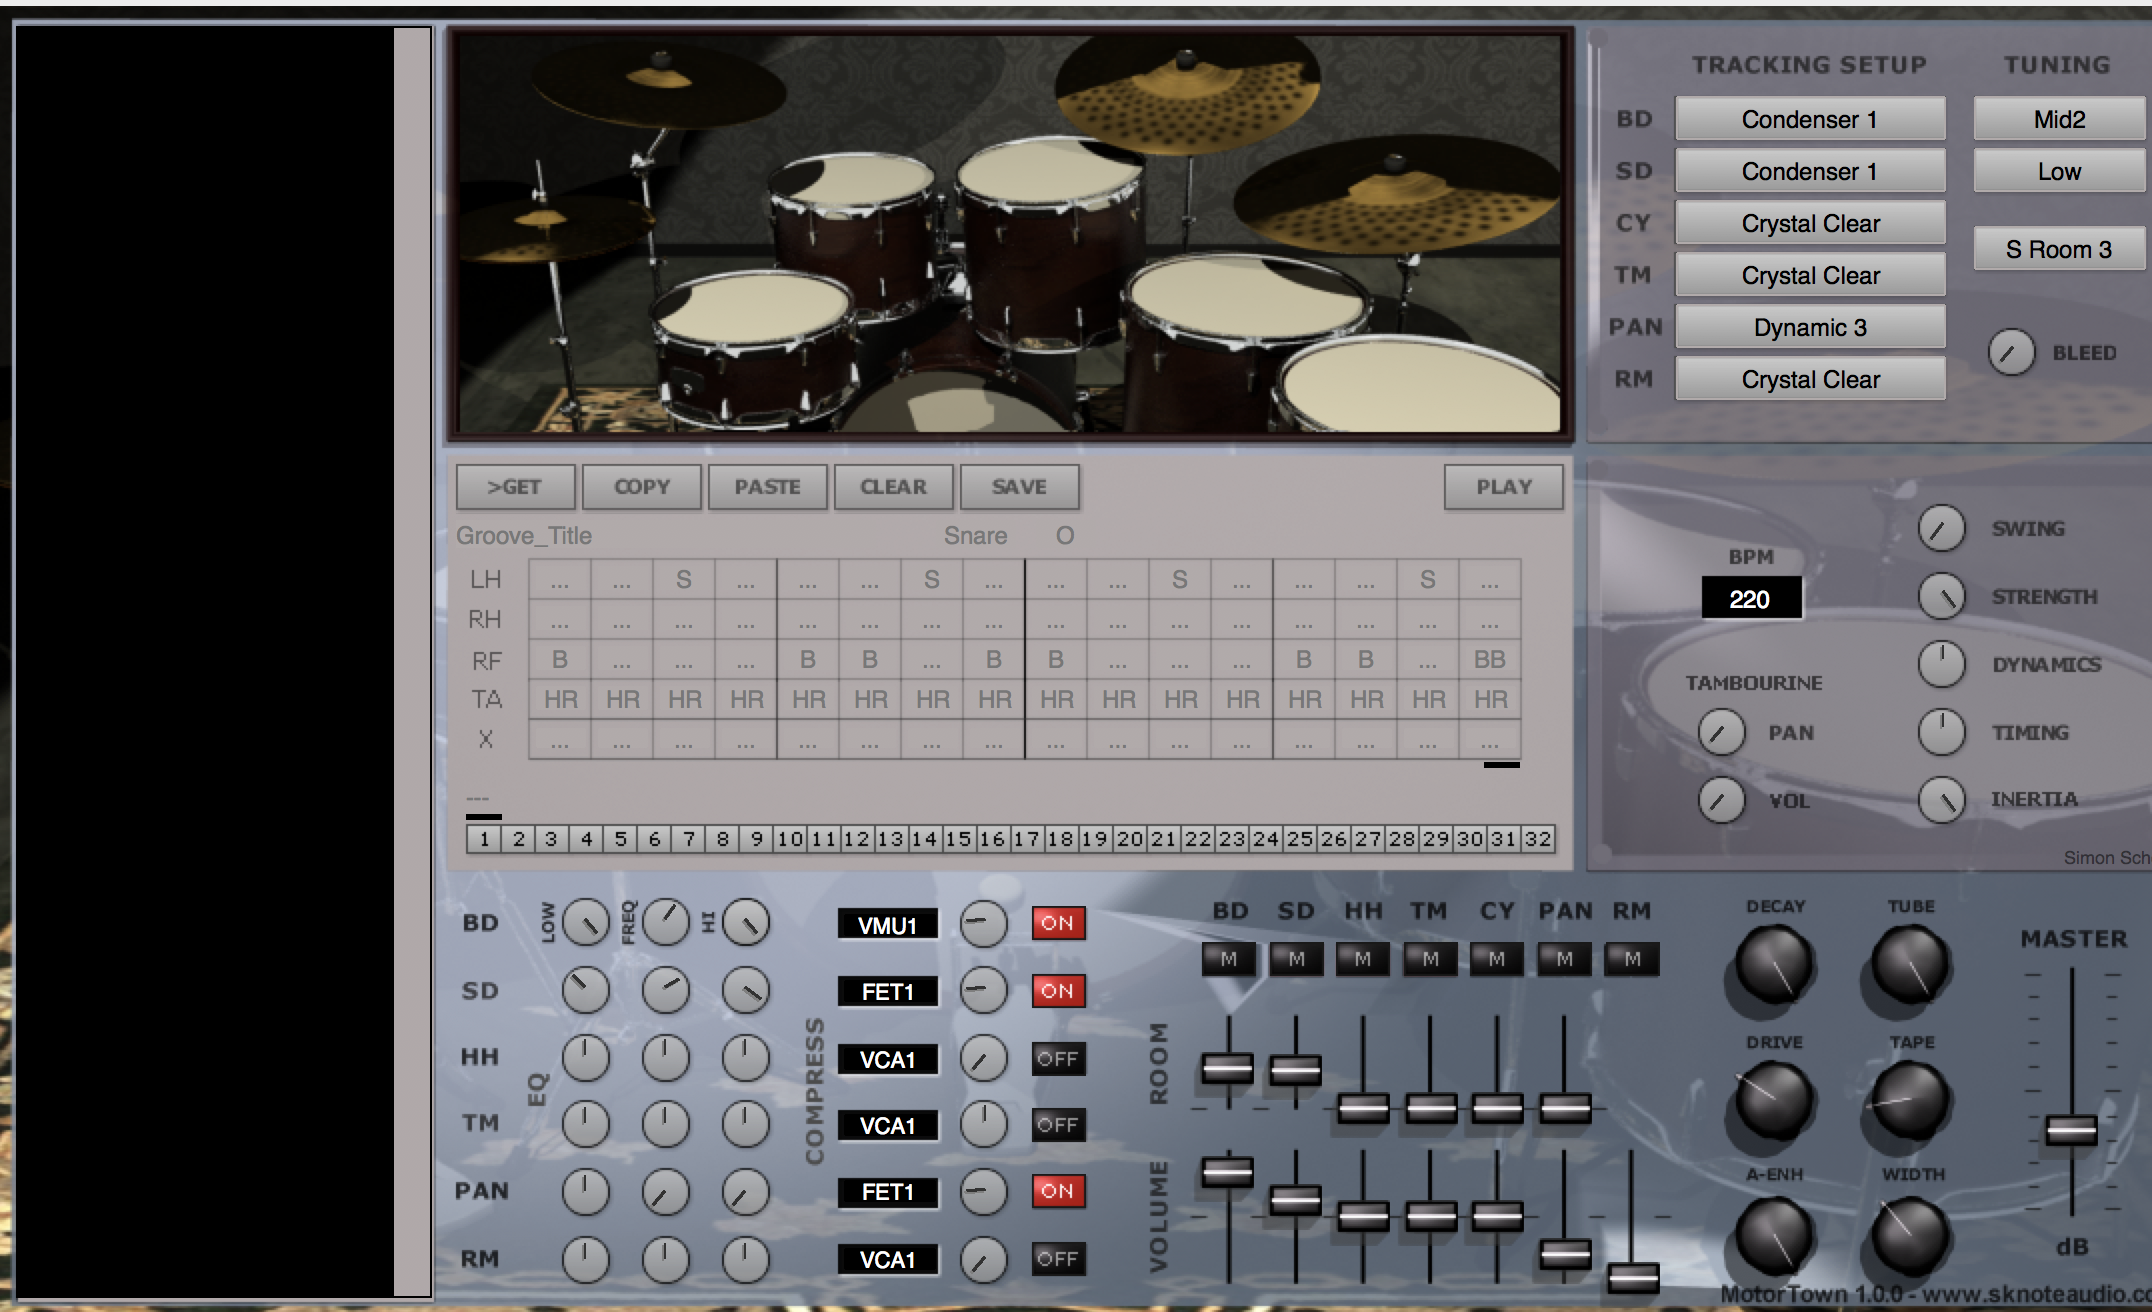
You can download the preset for MotorTown here: motortown-fx-preset-i-fxp