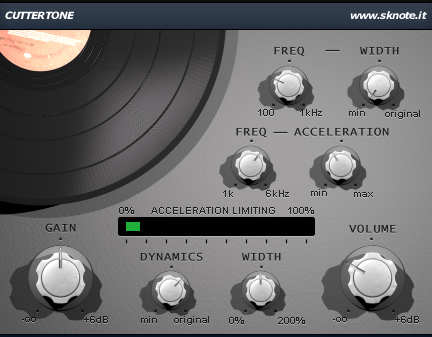
Today we’re going to be looking at a plugin which, for some indefinite reason, we haven’t actually featured on our blog at all yet: Cuttertone. We want to make up for that and show you exactly what this plugin does and why it can be an invaluable tool for mixing and mastering – all this while finalizing an atmospheric ambient composition!
Here’s the rough mix without Cuttertone:
Cut It
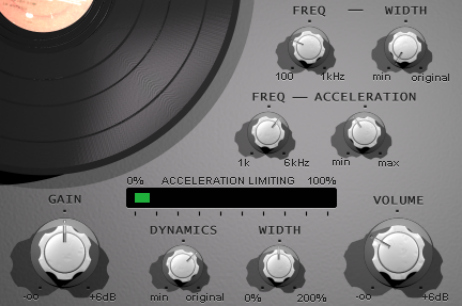
Since we want to process a full mix, we start by placing an instance of Cuttertone on the master bus. The first two controls at the top of the interface can be used to adjust the stereo width of the low frequencies. Usually it’s a good idea to keep the very bottom end in mono. Hence, we set the frequency crossover point (FREQ) to around 350Hz and then set the WIDTH-control to MIN. Now everything below 350Hz will be completely mono.
Next comes a very interesting and sophisticated feature, called the ‘acceleration limiter’. The purpose of it is to limit the high frequency content of the source signal. Imagine this to be a little bit like a dynamic high shelf, which reacts accordingly to the incoming audio. The ACTION-control could thus be seen as a threshold-control: the more you turn it to the left the more of the source signal will be processed, i. e. the more high frequencies will be ‘limited’. We don’t want to sacrifice any of our track’s clarity, but simply roll of some of the harsh high frequencies to make everything sound more organic and pleasant. Therefore we set the frequency knob (FREQ) to about 4.2kHz and turn the ACTION-knob until the green meter shows reflects the effect.
After that we take a look at the DYNAMICS-control – another special feature of Cuttertone. It’s actually quite self-explanatory: if you turn the knob towards MIN you effectively reduce the dynamic range of the source signal. When used with care, this can bring the various elements in a mix closer together, and also raise the overall (rms) level, without affecting the precious dynamics too much. As for our ambient track, we set the knob to 65%. However, since we also increased the volume by doing this, we lower the VOLUME-value so that the levels match again.
Finally, the WIDTH-control can either enhance or decrease the stereo image of the whole mix. We don’t need this feature in our case, so we leave it at its default value (100%).
The interface of the plugin should now look something like this:
The Result
Let’s go back to our example track and see how much better it sounds with Cuttertone engaged:
You can download the preset for Cuttertone here: Cuttertone Ambient Mix Preset.FXP