If you’re familiar with SoundBrigade or have read some of our previous tutorials on it on our blog, you might already know that it can be a very valuable tool in all different kinds of mixing scenarios, thanks to its five missions. Whether you need to tackle critical frequencies, want to enhance a certain sound or a whole mix, or use it for creative reasons, this plugin’s got you covered. In today’s session we will use three instances of SoundBrigade to treat three different sources: we will give some beefy low end to a synth bass, breath some fresh air in a drum loop, and boost the upper midrange of a synth pad to give it a little bit more weight.
Here’s the song we’ll be working on in its dry state:
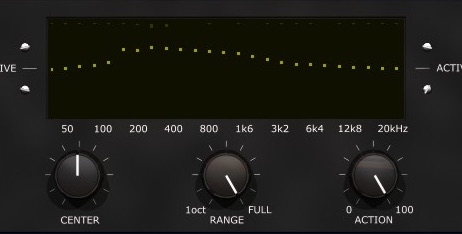
Mission Statement
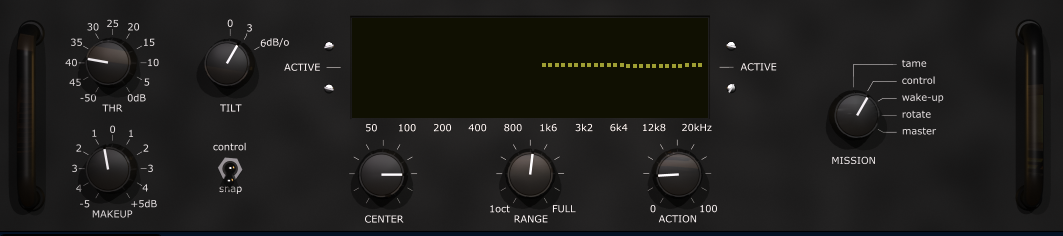
Drums
Let’s start with the drums. We don’t want to go crazy here, but only emphasize the upper frequencies a bit, so that they cut through the mix better. First we choose the ‘control’-mission, which does both attenuating frequencies above the threshold as well as boosting frequencies below it. A TILT-value of 3dB/o will support the transients in the loop. We then set up the CENTER and RANGE controls so that the effect only acts on frequencies above 1.6kHz (this will keep the kick untouched and clean). Finally, we turn down the threshold (THR) quite drastically, but also dial back the ACTION knob. The effect will thus be noticeable but not all to extreme. By lowering the MAKEUP gain a bit we make sure that the output level is the same as the input level.
The interface of the first instance should now look something like this:
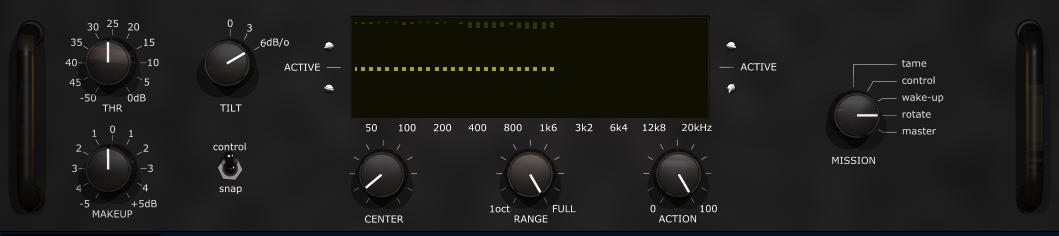
Synth Bass
All right, let’s move on to the bass. Since it’s the main instrument in our track we want to make sure that it sounds as strong and prominent as possible. We therefore place a fresh instance of SoundBrigade on its channel, and choose the ‘rotate’-mission. This mission rotates the phase of a signal and introduces some sort of ‘zap’-sounds, which are especially effective on the lower frequencies. Hence, we turn the CENTER-knob almost all the way to the left. Choosing a 6dB/o slope for the TILT-control and flipping the switch below from ‘snap’ to ‘control’ will make the overall effect even more apparent.
The interface of the second instance should now look something like this:
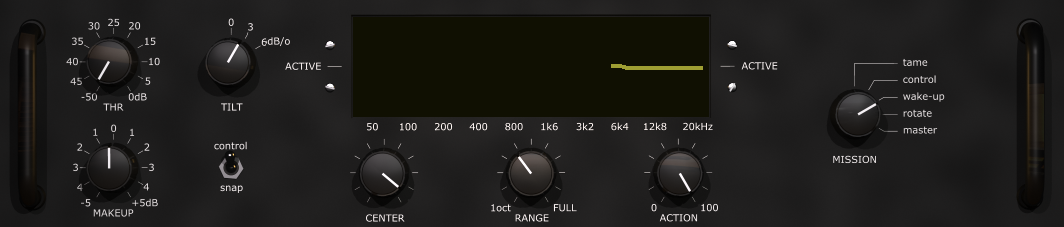
Synth Pad
Finally, we take care of the synth pad. This serves more like a ‘filler’ in our song, so we don’t want to over-emphasize it, but only apply a small amount of treatment. Here we go for the ‘wake-up’-mission, which will, in essence, do exactly that: wake the signal up or giving it a boost, if you will. As with the drums we choose a 3dB/o TILT-slope, before changing from ‘snap’ to ‘control’ like we did with the synth bass. We then set up the CENTER and RANGE values so that the plugin is working only on frequencies above 6.4kHz. The last step is to turn the threshold all the way to the left. This would usually sound pretty extreme, but since we narrowed the affected frequency area quite a bit this won’t cause any problems in our case.
The interface of the third instance should now look something like this:
The Result
And this is how our song eventually sounds like with all three instances of SoundBrigade engaged:
You can download the presets for SoundBrigade here: SoundBrigade_Multi-Purpose_Presets